

While developing a web application, developers often have to interact with the database (save and fetch data to and from a database). This blog post describes an easy way to connect your React project with Firebase database.
To read this blog post, you need to be familiar with React library and Firebase database.
What is Firebase
Firebase is a backend service provided by Google. It contains a database and API to which we can send requests. To start working with this service, you only need a Goggle account.

Why to use Firebase with React
When we use React library in our frontend project, we would not want to connect to database directly. If we do so, we will have security issues. Why?
We could simply connect our single page React app in a similar way as we connect a Node.js app (or any other server-side app):
mysql.connect('database-path', 'username', 'password')
    .then(db => db.query('SELECT * FROM users'));
As written in the code above, we could use some database driver/ package (in this example for MySQL) and then use methods exposed by that driver to connect to the database and then run queries against it.
BUT if we connect to database like shown above, we have to put all our database credentials and queries directly into our frontend code. This code is accessible by everyone though!
Just open the dev tools in browser and see the code - that's how web works.
That’s why any code that “talks” to a database belongs onto a server and the users can’t access that code.
This is exactly the way how React works with Firebase - React needs a backend API to which it will send HTTP requests and Firebase provides that API.
Connecting React project with Firebase
As mentioned above, Firebase provides a database API, which accepts a data in a JSON format returns a data in a special format back. React will use this API to fetch data from it or to send data to it to store into database (buy using methods POST and GET).
To configure a Firebase, just simply follow the steps on Firebase official page. Below I'll write down them shortly:
- click Get Started
- start a new project
- go to Realtime Database (on the left side)
- create database
- choose "Start in test mode"
And you got your database and API link (see screenshot below):
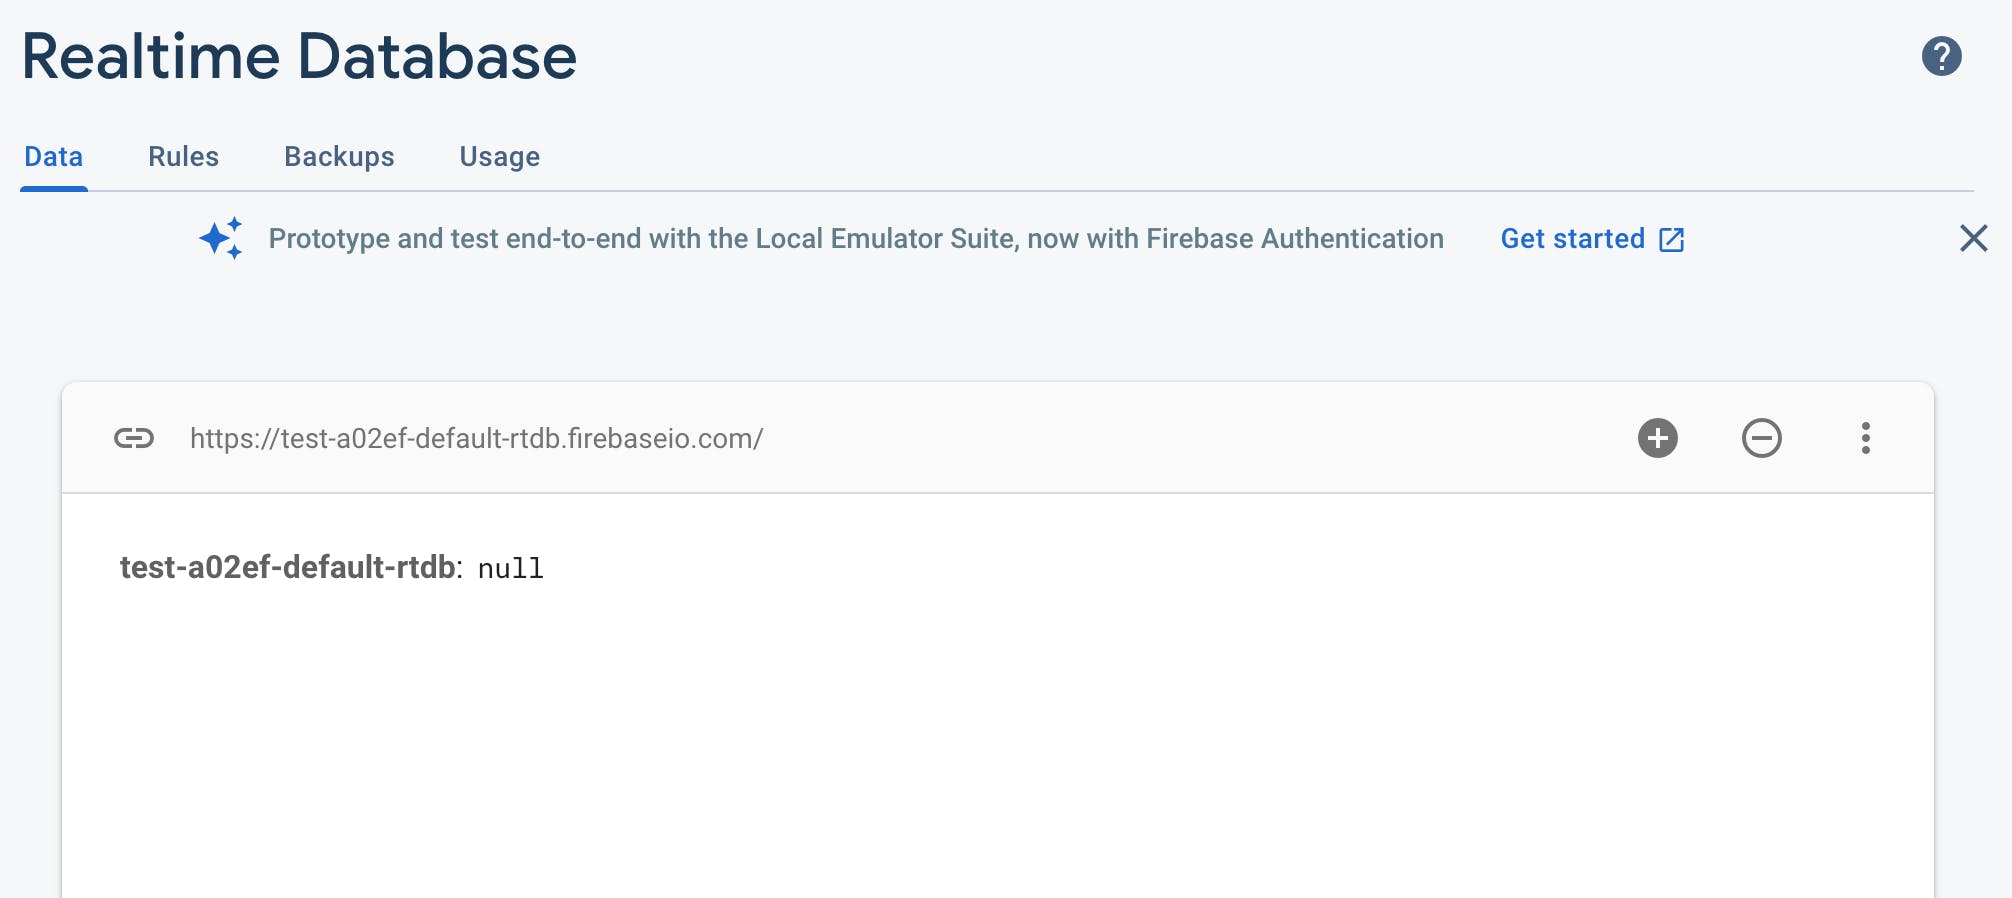
That was simple :) Now let's use it in our project.
Let's assume we have a simple React project with a form. The user fills in the form and after button click all info goes to database.
Our Form component will look like this:
// Form.js
export const Form = () => {
  // We are using refs here to access the value of DOM nodes
  const titleRef = useRef();
  const imageRef = useRef();
  const addressRef = useRef();
  const descRef = useRef();

return (
    <div>
      <form onSubmit={handleSubmit}>
        <div>
          <label htmlFor="title">Title:</label>
          <input type="text" id="title" required ref {titleRef} />
        </div>
        <div>
          <label htmlFor="img">Image:</label>
          <input type="url" id="img" required ref={imageRef} />
        </div>
        <div>
          <label htmlFor="address">Address:</label>
          <input type="text" id="address" required ref={addressRef} />
        </div>
        <div>
          <label htmlFor="desc">Description:</label>
          <textarea type="text" id="desc" rows="5" required ref={descRef} />
        </div>
        <div>
          <button>Add</button>
        </div>
      </form>
    </div>
}
When the user fills in the required fields in the form and click on Add button, the form will trigger onSubmit event, which in its turn will call a method handleSubmit.
This method creates an object, which we will use to send the user's data to the database:
const handleSubmit = (event) => {

    event.preventDefault();

    const enteredData = {
      title: titleRef.current.value,
      image: imageRef.current.value,
      address: addressRef.current.value,
      description: descRef.current.value,
    };
  };
Now we can send enteredData object to the database by using API provided by database and JavaScript method fetch().
Method fetch()accepts as parameters:
- path (in our case - Firebase API link)
Note: When we use the Firebase API link as path, we need to add the name of data we store and
.jsonto the end (for example, if we store todos, we addtodos.jsonto the end of API link) - init object with number of different settings
If we use fetch() just with path, it will execute GET method by default. Since we want to send data, we need to add second parameter and specify that we want to use POST method.
Our handleSubmit method now would look like this:
const handleSubmit = (event) => {

    event.preventDefault();

    const enteredData = {
      title: titleRef.current.value,
      image: imageRef.current.value,
      address: addressRef.current.value,
      description: descRef.current.value,
    };

    fetch(
      "https://test-a02ef-default-rtdb.firebaseio.com/info.json",
      {
        method: "POST",
        body: JSON.stringify(enteredData),
        headers: { "Content-Type": "application/json" },
      }
    );
  };
After the user provided all required data to the form and clicked Add button, the form sends the data to database. We can refresh our Firebase project and see the data being stored there. Yay!
Conclusion
With Firebase we can store our data to the database. We can also fetch the data from our database and render it to the page we need by using the same API link provided by Firebase. It might look as if we are interacting directly with a database, but now we know that this is not what’s happening!
Instead, services like Firebase give you a backend which is kind of hidden from the user and we only use that backend API to interact with the database.
Thank you for reading my blog. Feel free to connect on LinkedIn or Twitter :)